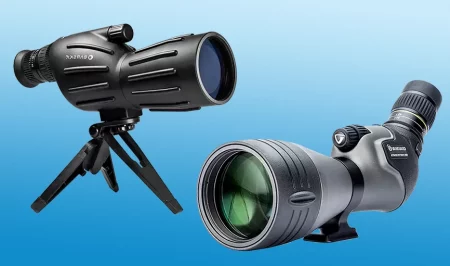
Hobbyists and photographers, especially those working on wildlife projects may run into a few problems while getting close to their targets with their 400mm or 500mm lenses. For that, we recommend that you attach a DSLR to a spotting scope to not only solve this distancing issue but achieve more quality in your work.
Now with a spotting scope, you can enjoy the power of 800mm or more simply by attaching an accessory usually referred to as a digiscoping adapter. If you are lucky, you would already have a T2 mount when you bought your camera otherwise, you can invest in one.
This is going to be a complete step-by-step guide about how to attach a DSLR to a spotting scope when to attach it, the pros, and cons of doing so.
Summary
To attach a DSLR to your spotting scope:
- Mount your DSLR to a spotting scope using a T-ring adapter, a.k.a, T2 mount.
- Do basic camera adjustments such as aperture, ISO, and magnification.
- Use the dial on your spotting for adjusting the magnification to take quality photos.
A Step-By-Step Guide To Attaching A DSLR To A Spotting Scope
Attaching a DSLR to a spotting scope requires a couple of attachments and a few easy installation steps. We are going to head straight to the guide to help you with the mounting process.
1. Attach The Adapter (T-Ring)
As mentioned before, you are going to need an extra attachment to mount a DSLR on a spotting scope. This attachment or adapter is referred to as a T-mount or T-ring. Now, if you have one, you are good to go but if you don’t you will need a few recommendations.
For Canon users, we recommend buying Celestron 93419 T-Ring which is just the perfect attachment when it comes to compatibility. However, being a Nikon user, you can go for almost any quality T-ring brand and it would since we have seen almost zero T-ring compatibility issues with the Nikon cameras.
Note: Other than Nikon cameras that fit in on any T-ring arrangement, go for T2 mounts for Canon and other camera brands.
Now, here is a step-by-step guide to attaching a T-ring to a DSLR camera:
- Remove the rubber cap from the eyepiece of the camera.
- Attach the T-ring to the EP (eyepiece) thread to make them ready for being mounted.
- Now, remove the camera lens.
- Install the T-ring arrangement from the first two steps to the camera.
- Since the spotting scope lacks automatic features, set the camera to the manual mode.
- In the same way, you will be enabling the video mode for videography.
- Secure the eyepiece (EP) thread to the EP hole of the spotting scope.
- And, there you go, you have successfully mounted the T-ring and EP arrangement on the scope.
2. Attach The Camera
Once the T-ring has been mounted, the rest of the camera mounting process is too easy. There is just a simple step of picking up your camera and mounting it on your spotting scope.
3. Camera Settings
First, we recommend that you select a test subject to test and adjust the focus settings. Once you have done so, use the spotting scope focus dial to focus the object on the camera screen.
Aperture
There is a limited range of exposure modes due to the lack of an electronic connection between the two devices. In such a condition, we recommend going manual, and choosing the aperture-priority mode, especially in the changing light conditions is crucial. Also, do it before you mount the camera on a spotting scope because you cannot adjust that later.
ISO Settings
It is still okay if you forgot about setting the aperture before attaching the camera to a spotting scope. That is because of a simple solution and that is using the automatic ISO settings. This will enable the camera to adjust the exposure without depending on the shutter speed of the device. However, for sharper results, a manual setting like 1600 ISO will be a perfect fit.
The Right Frame and Focus
While digiscoping is quite convenient on lower magnifications, it certainly becomes a challenge at higher ones. For that, the top tip that we can give you is to select a test subject after doing all the settings and focus it on various magnifications before you go for the actual fieldwork.
Spotting Scope and Camera Alignment
Make sure that the optics on both your DSLR and spotting scope are compatible. Also, they might be balanced right on the tripod rail for stable photos. Ignoring the quality difference between the two will lead to poor-quality pictures with color, brightness, and image blur.
Since the spotting scopes have low default apertures, taking sharper images is a challenge. For that, another top tip we want to add is using the live view for better frames and focus. When you are using a viewfinder all the time, it puts a limitation on what you can and can’t see.
When to Attach a DSLR to a Spotting Scope?
Even though a spotting scope solves your distancing problem, it does have a few limitations. For instance, since it is not a primary solution designed for taking photographs, it lacks all those automatic features programmed with the original cameras lenses.
Limitations/ Disadvantages of using a DSLR with a Spotting Scope
The following is a list of a few automatic features lacking in a spotting scope that wouldn’t allow you to use this particular gadget with a DSLR in low-light conditions.
The first thing a spotting scope lacks is an automatic focus system or a variable aperture. They do have an effective aperture but even the latest ones have that between f/8 and f/16. Now, to obtain better results out of these, you need to work on a brighter day otherwise, the quality of the image will be greatly affected.
Also, the shutter speed of a camera is affected when mounted on a spotting scope often leading to blurring images. A solution to that problem lies in using high ISO settings that will increase the shutter speed, preventing the blur for good.
To summarize; attaching a DLSR to a spotting scope is usually suitable in bright light conditions. It can be used in low-light as well, however, for that, you will need to tweak the camera settings to make it all work.
Pros and Cons of Attaching a DSLR to a Spotting Scope
Pros
- Saves you money as compared to when you buy expensive camera lenses.
- You get higher magnifications, allowing you to reach far-off targets.
- The image quality you get is sharper and crisper resulting in high-quality work.
Cons
- A spotting scope doesn’t have auto-focus so focusing on fast-moving objects becomes difficult.
- There are no automatic image stabilization features so you will need to count on your skills.
- As compared to the camera lenses, these are heavy and hard-to-carry.
Frequently Asked Questions
What is the function of a T-ring adapter?
A T-ring adapter aligns the focal plane of your DSLR camera sensor with the telescope to reduce camera shake and produce crisp images at high magnifications.
What is the best spotting scope for digiscoping?
Celestron Ultima 80 is our favorite when it comes to digiscoping since it is lighter, compatible with almost all DSLR cameras, and provides a free T-ring adapter if you buy a new one.
Conclusion
So, digiscoping is all about measuring your options right, knowing your requirements, and then using the above steps to install everything with ease and grace.
We hope that this complete guide resolves each of your queries about how to attach a DSLR to a spotting scope. Besides the main guide, make sure that you use all-important top tips given in the guide for making the process more effective.
If you face any further problems mainly because you are using a different DSLR or spotting scope brand, reach out to us and we shall be forthcoming in answering ASAP.


Leave a Reply